
A major renovation quickly turns into an expensive headache when trades arrive at the job site out of order. Homeowners often assume that hiring skilled specialists is all it takes to complete a project smoothly. Talented craftspeople cannot work effectively if preceding trades have not prepared the space properly. When drywall encloses walls before pipes and wiring pass inspection, or when flooring is laid before the ceiling overhead is sealed, delays and change orders multiply rapidly.
The financial fallout of poor scheduling catches many property owners off guard. Having a crew rip out fresh sheetrock to fix a missing vent pipe burns through contingency funds and pushes move-in dates back by months. Subcontractors arriving at an unprepared site usually leave for another project. Getting them back onto the schedule can take weeks.
Most successful projects rely on a clear chain of operations. Professional remodeling companies maintain detailed milestone charts that map out every phase from demolition to handover. Understanding this timeline allows homeowners to manage expectations, budget intelligently, and spot trouble early.
Establishing the Footprint: Demolition, Excavation, and Framing
Before internal work can take place, the physical shell of the house must be established. For projects that alter the size or shape of a home, this stage begins with heavy equipment, excavation, and concrete formwork. Pouring footings, setting stem walls, and backfilling dirt require clear access around the perimeter of the building. Indoor work during excavation invites dust contamination and safety hazards.
Once the concrete foundation cures, the framing crew steps in to build the structural skeleton. Wall studs, floor joists, ceiling rafters, and window openings must be assembled to exact engineering specifications. If a homeowner is building a spacious home addition, the framing stage represents the moment when blueprints transform into real living spaces. The framing crew must verify that every wall is plumb and square, creating uniform cavities that mechanical trades need.
During this early structural phase, weather protection remains minimal. Framers work quickly to wrap the exterior in moisture barriers and secure temporary wall bracing. Mechanical installations should never begin while framing remains exposed to weather.
Weatherproofing the Shell: Sealing the Overhead Elements

A house must be dry before interior mechanical work can safely begin. Moisture from rain or snow will warp fresh lumber, ruin unsealed subfloors, and introduce mold into enclosed cavities before the job is half finished. Securing the roof is the next critical milestone in the construction sequence. Roofers install underlayment, drip edges, metal flashing, and shingles or panels to create a watertight canopy above the framing.
In many extensive remodels, tying new rooflines into existing construction uncovers hidden rot or structural sagging that must be addressed immediately. A targeted roof repair on an adjoining slope is often necessary to guarantee that new and old materials join together without leaving gaps for moisture to enter. Flashing along valleys and sidewalls demands attention, as these junctions represent common failure points.
Once the roof is sealed, the building is officially dry. Toolboxes, sensitive electronic equipment, and insulation bundles can now be safely stored on site without fear of sudden storms. The structure is ready to welcome specialized mechanical trades inside.
Managing Overhead Runoff and Exterior Drainage Pathways
A sealed roof deck is only half the battle when it comes to moisture management. Once precipitation hits the roof, it must be guided safely away from the freshly poured foundation and exposed wall sheathing. Water cascading off eaves erodes perimeter backfill, seeps into crawl spaces, and compromises footings.
Connecting professional gutter services into the renovation schedule at this precise juncture prevents thousands of dollars in water-related foundation damage. Installing seamless aluminum or copper channels along fascia boards ensures that heavy downpours are captured immediately. The downspouts must be routed to discharge water well beyond the excavation zone, keeping surrounding soil firm and stable.
Beyond immediate erosion control, installing gutters before starting interior work protects exterior siding and windows from backsplash. Mud and debris splashed against raw wood or primer can cause staining and rot before painters arrive. Managing roof runoff early maintains a clean, stable building envelope that protects both structural investments and subsequent trade work.
Mechanical Rough-Ins Part One: Plumbing Lines and Vents
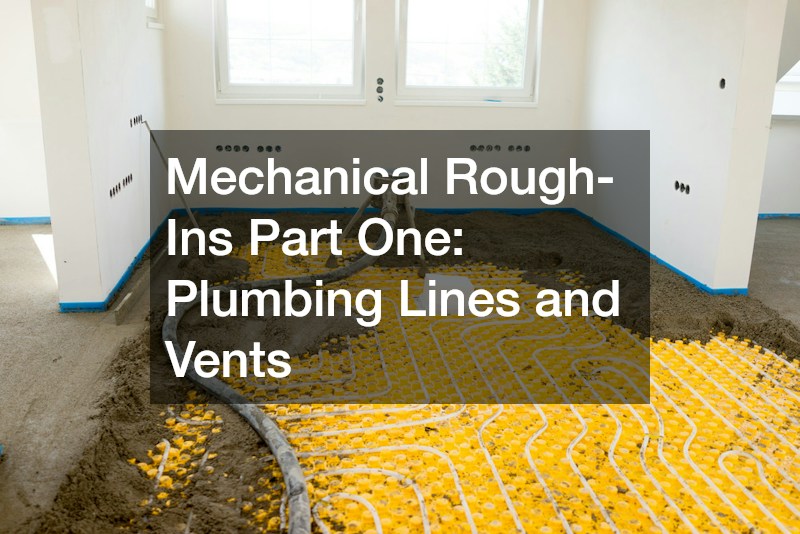
With the building protected from weather, the interior mechanical stage begins. This phase follows a strict hierarchy based on the physical flexibility of the materials being installed. Trades that work with rigid, bulky pipes that rely on gravity must always receive first priority inside open wall cavities.
For this reason, a qualified local plumber enters the site before any other mechanical specialist. Drain, waste, and vent pipes are large and must maintain specific downward slopes to function correctly. A drain line cannot bend around conduit or ducts; it must follow a continuous slope through joists and studs. The plumbing crew drills necessary penetrations, runs main soil stacks, and positions supply lines for future sinks, showers, and toilets.
Rough plumbing also includes establishing main shutoff valves and testing the entire system under pressure. Inspectors require a pressure test, filling lines with air or water to prove there are no hidden leaks behind the framework. Only after these primary gravity-fed drain lines are secured can other trades begin.
Mechanical Rough-Ins Part Two: Air Distribution and Ductwork
After drain pipes and soil stacks are firmly in place, the climate control team enters the structure. Heating and cooling equipment requires substantial physical space, second only to the main plumbing drains. Sheet metal trunk lines, flexible return ducts, and intake vents must navigate joist bays without crushing or compromising structural framing.
When extensive layout changes occur, homeowners often discover that their existing heating and cooling equipment cannot handle the altered square footage. Bringing in an HVAC repair specialist during the rough-in stage ensures that the entire airflow network is evaluated before walls are enclosed. Technicians balance duct sizes, run refrigerant lines, and install condensate drains that tie safely into the building drainage plan.
Coordination between trades is particularly important during this phase. Ductwork must never block access to plumbing cleanouts or prevent the future installation of ceiling fixtures. By placing mechanical ductwork immediately after rigid plumbing, the heating crew routes supply branches cleanly, leaving organized, predictable open cavities for the electrical trades that follow.
Mechanical Rough-Ins Part Three: Dedicated Hot Water Infrastructure

With the main drainage network and airflow pathways established, attention turns to the core hot water delivery system. High-demand residential upgrades frequently require specialized equipment, such as high-efficiency tankless units or heat pump storage systems. These appliances require specific clearance standards, gas pipe sizing, and dedicated venting routes.
Enlisting a certified water heater contractor at this point in the rough-in schedule ensures that utility feeds match appliance specifications. A tankless system, for example, often requires a larger gas line than standard atmospheric models, along with dedicated electrical circuits and direct-vent exhaust pipes through the exterior wall. Positioning this equipment early prevents trades from fighting over limited wall space in utility rooms or basements.
Furthermore, proper placement of the water heater influences hot water delivery times throughout the living spaces. The contractor can route recirculation loops and connect manifold systems before framing is covered. This deliberate approach guarantees that the system meets local safety codes, operates efficiently, and integrates smoothly with existing plumbing infrastructure.
Mechanical Rough-Ins Part Four: Electrical and Low-Voltage Wiring
Electrical work is the most flexible of all rough-in trades, which is why it comes last among mechanical installations. Copper wires bend around corners, pass through drilled studs, and thread easily through remaining framing cavities. If wires were installed first, heavier trades would inevitably smash or cut them while wrestling large pipes and ducts into place.
A licensed electrician steps onto the site to pull wiring for outlets, switches, light fixtures, and major appliances. This professional calculates total electrical loads, updates the main service panel if necessary, and installs sturdy metal or plastic junction boxes at precise heights. Dedicated circuits must be run for heavy-draw equipment like ovens, clothes dryers, and vehicle chargers, ensuring the home operates safely under modern electrical loads.
The rough electrical stage also encompasses low-voltage communication cabling, such as ethernet lines, audio speaker wires, and security sensors. Once all wiring is secured, the entire house undergoes a comprehensive rough-in inspection. The building inspector must examine every pipe, duct, and wire before drywall can be hung.
Heavy Outdoor Surface Construction and Site Access

While the interior undergoes mechanical inspections, attention can shift to restoring the exterior grounds. Months of foot traffic, delivery trucks, and foundation machinery leave the perimeter of a house severely compacted and rutted. Heavy structural outdoor work must occur before fine soil preparation and plantings begin, as heavy machinery would instantly destroy delicate turf and root systems.
Engaging a reputable hardscaping company during this transitional phase allows for the construction of retaining walls, stone patios, concrete driveways, and pedestrian walkways. These masonry features establish permanent pedestrian traffic paths and create physical barriers that separate living spaces from natural grades. Excavating for paver bases and setting heavy gravel sub-layers requires skid steers and plate compactors that need wide turning room across the yard.
Properly executed hardscape features also complement the moisture management strategy of the home. Retaining walls must feature internal gravel drains and weep holes to relieve hydrostatic pressure behind the stone. Paver patios must be graded with a subtle slope away from the siding. Completing heavy stone work now keeps heavy machinery away during later, delicate stages.
Outdoor Rehabilitation and Softscape Finalization
Once heavy masonry, concrete walkways, and retaining walls are built, the remaining outdoor space can be restored. Construction sites take a massive toll on the surrounding environment, stripping topsoil, crushing native root systems, and altering natural water runoff paths across the property. Leaving this ground barren invites severe erosion, mud tracking, and unsightly weed infestations.
Bringing in professional landscapers at this stage transforms the disturbed site into an attractive, functional outdoor environment. These specialists loosen compacted subsoil, spread fresh, nutrient-rich topsoil, and grade the lawn to support natural drainage patterns. They install perimeter planting beds, native shrubs, shade trees, and sod or grass seed that permanently bind the topsoil against heavy wind and seasonal rains.
Timing this softscape work after heavy construction trades have finished prevents damage to young plants. When trucks and heavy supply pallets no longer cross the property, new sod can take root without being rutted by tires. Healthy plantings around the foundation not only elevate curb appeal but also absorb surplus rainwater, acting as an organic complement to exterior drainage systems.
The Finishing Sequence: Insulation, Drywall, and Surface Coatings
Back inside the home, passing the rough mechanical inspection clears the way for enclosing the walls. Insulation crews install fiberglass batts, mineral wool, or spray foam to meet regional energy efficiency codes. Vapor barriers must be sealed with meticulous care to prevent warm, humid indoor air from penetrating cold wall cavities during winter months.
Drywall installation follows immediately. Hanging, taping, and sanding sheetrock is a dusty, messy process that temporarily fills the home with fine gypsum powder. Once drywall is smooth, painters apply primer and initial base coats to ceilings and walls. Trim carpenters then install interior doors, baseboards, window casings, and custom cabinetry. Throughout these interior milestones, licensed remodeling companies keep subcontractors moving in harmony, preventing trim carpenters and tile setters from interfering with one another.
Flooring installation represents the final delicate surface upgrade. Hardwood planks, luxury vinyl, or stone tile should only be laid down after messy drywall sanding and primary painting are complete. Protecting these expensive finished surfaces requires disciplined job site etiquette, ensuring that workers wear protective shoe covers and lay temporary runners over walkways.
The Second Fix: Trimming Out Utilities and Final Sign-Off
With walls painted, cabinets hung, and floors protected, trade specialists return for what the construction industry calls the second fix or trim-out. During this phase, mechanical systems transition from rough wall penetrations into polished, fully operational fixtures. Each trade connects the specific aesthetic and functional elements that property owners interact with daily.
The electrical team returns to mount designer light fixtures, screw on wall plate covers, and install smart thermostats. Meanwhile, the plumbing crew sets toilets, drops undermount sinks into countertops, and tests faucets for pressure. The heating technicians balance airflow registers in every room to guarantee even temperatures.
When a project includes a multi-room home addition, this final stage also requires close coordination between trade specialists to ensure whole-house system balance. Final municipal inspections are scheduled to review plumbing fixtures, electrical grounding, smoke alarms, and mechanical venting. When the building inspector signs the certificate of occupancy, the property owner receives a fully certified, beautifully finished space built on the foundation of a disciplined, professional sequencing playbook.